
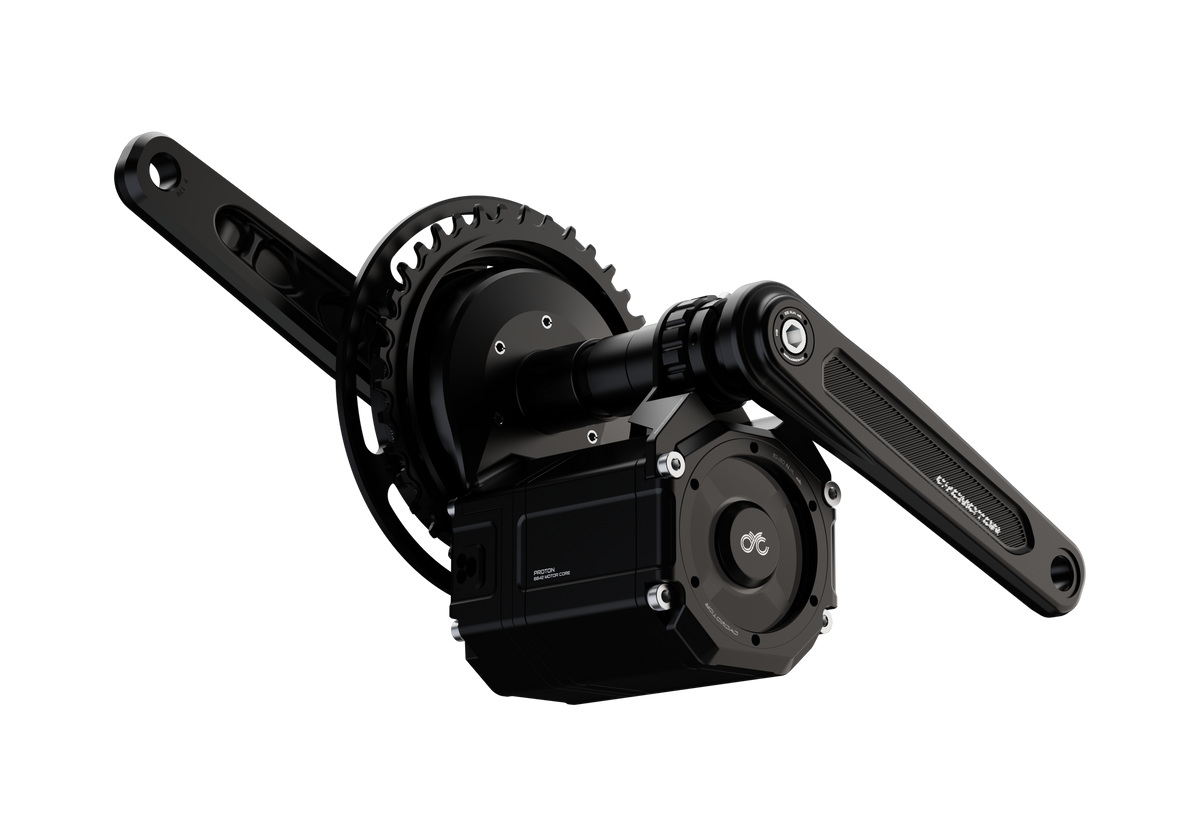
Installing a CYC Photon Pro takes an afternoon and basic bike tools. You pull the cranks and old bottom bracket, slide the motor into the shell with the right spacers, lock it in with the left cup, then fit the spindle, cranks and chainring and plug in the harness. The details that matter are the spacers for your shell width, the motor angle against the chainstay, and the torque on the left cup and crank bolts. The specs and steps below come from CYC's Photon Pro user manual, so keep it open while you work.
Before you start: check your bottom bracket
The Photon Pro kit comes in four versions: 68-83mm BSA threaded, 100mm BSA, 120mm BSA and BB92. Measure your shell width and check whether it's threaded or press-fit before you order. If your bottom bracket isn't on that list, talk to us first. It may still work, but we'd rather check than guess.
Print the 1:1 motor template from the product page and hold it against your frame. It's the quickest way to see whether the motor clears the down tube, chainstays and any suspension linkage.
Tools you'll need
Based on the CYC manual, plus a torque wrench:
- 3mm, 8mm and M10 hex keys (the M10 is for the crank bolts)
- adjustable wrench
- crank puller, to remove your old cranks
- a 16-notch bottom bracket tool, for the left cup
- press-fit BB removal tools (BB92 frames only)
- soft mallet
- the V-shaped tool for the chainring cover
- torque wrench
For the chainring cover, the CYC Photon chainring removal tool fits both the Gen 2 and the Pro.
Spacer and chainline table
The Photon Pro uses spacers on the left side to center the motor in narrower shells. These are CYC's numbers for the Pro:
| Bottom bracket | Q factor | Chainline | Left spacers | Right spacers |
|---|---|---|---|---|
| BSA 68mm | 200 | ~50 | 5 + 7 | 3 |
| BSA 73mm | 200 | ~50 | 3 + 7 | 0 |
| BSA 83mm | 200 | ~55 | 0 | 0 |
| BB92 | 220 | ~63 | 3 + 3 | 0 |
| BSA 100mm | 220 | ~63 | 0 | 0 |
| BSA 120mm | 240 | ~73 | 0 | 0 |
An optional 0.5mm spacer is included to take up frame tolerance. These numbers are for the Pro. The Photon Gen 2 table is a little different, so don't mix them up if you've installed a Gen 2 before.
Step by step
- Remove the old parts. Take off the pedals and cranks with the crank puller, then remove the bottom bracket. On a BB92 frame, press the cups out with the press-fit tools. Clean the shell and threads.
- Fit the motor. Add the right-side spacer if your shell needs one, then slide the motor in from the drive side. It should sit flat against the shell.
- Set the motor angle. Rotate the motor up toward the chainstay. CYC specifies 13mm of clearance between the chainstay and the motor. CYC also says the motor body must be supported against the frame or a support structure.
- Install the left cup. Grease the threads, add the left spacers for your shell, and thread the left cup in by hand. Line the A-frame up with the cutout in the motor housing and snug it with the BB tool. Fit the two small screws in the motor housing at 3 Nm.
- Tighten the left cup. Check the motor is where you want it and the cup is going in perfectly straight. Then tighten it to 40-50 Nm. A crooked cup or spindle wears the bearings early and makes noise, so take your time here. If your frame needs it, fit the frame support plate now.
- Install the spindle. Grease the spindle, line up the splines and tap it in with a soft mallet until the step on the shaft meets the motor.
- Fit the lock ring. Thread the lock ring on with the stepped side facing the bike and tighten it by hand. Then tighten the small screw on the lock ring. Spin the spindle to make sure it turns freely.
- Add spindle spacers and cranks. Fit the spindle spacers up to the line marked on the spindle, then fit the crank arms with the M15 bolts at 55 Nm.
- Fit the chainring. Put the chainring on with the dotted side facing away from the bike. Next goes the spacer, with its larger inner diameter toward the motor. Grease the threads on the chainring cover, thread it on and tighten it with the V-tool. Lock it with the two grub screws at 2.5 Nm.
- Connect the wiring. Plug the motor's P1 connector into the 1-2 or 1-4 harness, and P2 into the speed sensor. Then connect the display, throttle and battery. Before you power up, make sure every plug is fully seated and nothing is pinched. CYC warns that a bad connection can damage the controller or battery.
- Set up the bike. If you fitted CYC magnetic brake sensors, turn them on in the CYC Ride Control app. They won't cut the motor until you do. Set the speed limits to match your local rules before you ride on public roads.
Torque specs in one place
| Fastener | Torque |
|---|---|
| Left bottom bracket cup | 40-50 Nm |
| Crank arm bolts (M15) | 55 Nm |
| Motor housing / A-frame screws | 3 Nm |
| Chainring cover grub screws (x2) | 2.5 Nm |
| Lock ring | Hand tight, then tighten the lock ring screw |
Picking a chainring
The Pro takes CYC chainrings from 32T to 50T. Smaller rings climb better and keep the motor spinning in its happy range on steep trails. Bigger rings suit faster, flatter riding. The 32T comes with its adapter already fitted. You can swap rings later with the Photon Gen 2 / Photon Pro chainring set, and our chainring adapter removal video shows how.
Things that go wrong
- Spindle won't turn freely. The left cup or spindle is usually slightly crooked. Back the cup off, realign it and tighten it again.
- Motor creaks or shifts under load. Check that the motor is supported against the frame and that the left cup is at 40-50 Nm.
- Brakes don't cut the motor. The brake sensors haven't been turned on in the Ride Control app.
- Chain drops or rubs. Recheck the spacer stack for your shell against the table above.
A few general rules from CYC worth keeping in mind:
- Don't shift under full motor power.
- Keep the chain at the right tension.
- Make sure the throttle snaps back freely.
- The motor is splash and rain resistant but not waterproof, so skip the pressure washer.
The full CYC Photon Pro user manual has the exploded diagrams if you want to see each part.
If you're still deciding between motors, our Photon 2 vs Photon Pro vs X1 Pro Gen 4 comparison covers the differences.
FAQ
How long does it take to install a Photon Pro?
Plan on an afternoon for your first one, longer if your bottom bracket is seized or you're cutting and routing cables neatly. Once you've done one, it goes a lot faster.
Can I install the Photon Pro on a press-fit frame?
Yes, if it's BB92. There's a dedicated BB92 version. For other press-fit standards, contact us before you order.
Does the Photon Pro install the same way as the Photon Gen 2?
It's the same basic layout and the same bottom bracket options. The spacer stack and Q factor are different, so use the Pro numbers above, not your Gen 2 notes. The chainrings are the same on both.
Which displays work with the Photon Pro?
The kit ships with either the SW102T or the colour Intuition display. Those are the two CYC lists for the Pro.
Do I need brake sensors?
They're optional, but we recommend them. They cut motor power the moment you pull a lever, which matters on a 3,000W rated motor.
Share:
Will the CYC X1 Pro Gen 4 Fit Your Bike? Bottom Bracket Versions, Chainline, Gearing and Frame Clearance